Friday Tutorial: Finishing the 2 at a Time Hats

We’re nearing the end of our hats! This week we’re going to finish them up and learn how to decrease stitches using double knitting. You may want to use a cable needle or stitch holder of some sort, as you will need to move stitches around to do the decreases. Once I’ve made a few decreases and they get closer together, I will usually just move all of the stitches from one hat to a new set of needles to “hold” it and finish them separately. This works out pretty well and is a little less stressful. However, it doesn’t work so well when you’re working the heel of a sock, so i’m going to explain how this is done – just in case you want to do it.

The pattern tells us to knit 6 and decrease (knit together)2. So for our hats, we’ll knit the first 12 stitches (6 blue, 6 orange) and then slip 1 blue stitch.

Slip 1 blue stitch

To get your stitches next to each other you need to drop one orange (back) stitch from your needle, work the knit 2 together with the blue, then place the dropped stitch back on the needle to knit two orange together.

move 1 orange stitch to holder
Move blue stitch back to working needle, knit 2 together
Slip orange stitch back to working needle

2 orange together

 I usually just hold my dropped stitch in my left hand, work the k2tog, then place it back on the needle. However, you CAN use a small cable needle here or a juice pouch straw or something to hold that stitch if you’re afraid you can’t keep it from dropping and running. We want to be careful we don’t knit a blue and orange together either. That defeats our whole purpose.

holding dropped stitch 

If you want to separate the hats to make the decreases, you will need a circular needle or another set of dpns to hold the stitches on one hat. It doesn’t have to be the same size, as you’re just holding them and can move them back once you complete the first hat.

Working in reverse of our cast on, slip 1 blue stitch to the working dpn. Slip 1 orange stitch to the holding needle. Keep slipping stitches until they are all moved. Pull the inside hat up through the top of the outside hat and lay aside to work later.

Finish your hat as directed in the pattern and voila! you have a hat to share and one to keep. Or give both. Or whatever. I hope you had fun with this tutorial series and learned a lot. I also hope you try this technique with other applications like sleeves and scarves. If you would like to donate your extra hat, would you consider donating it to my charity Warm Up the Boro? I collect donated hats and scarves and hand them out in our community during the cold winter months. You can find out more on our Facebook page http://www.facebook.com/warmuptheboro.

As always, please post pics to the Flickr group

Tuesday Needlework: Yarn Bombing

Obviously I knit and crochet. Obviously I love yarn and many things made from it. I think it is an art form that some master with skill. I find value in wool, cotton, and natural materials gathered, spun, dyed, and distributed. Obviously I think yarn bombing is the biggest waste of time, energy, talent, and yarn that ever existed. Yep, I said it. It’s a waste. I’m a huge fan of art, too. Creating it and distributing it and appreciating it. In a wide variety of forms. But to me, yarn bombing is a desperate cry for nothing better to do with one’s time than make tubes to tie on trees.

It looks terrible. Nature can never be improved in any way by knitting something to put on it. And defacing someone else’s art (statues, sculptures, etc.) by putting YOUR yarn on it is sacrilegious. It irritates me in ways I can’t even explain. Especially when I see these long works that took hours to make (and who knows how much wool and/or polluting acrylics) draped over some bush in the park, doing nothing more than interfering with natural beauty and wildlife. And why in the world would it make any kind of a statement to cover a bridge in yarn? The whole thing just grates on my nerves and I want to scream, “DO SOMETHING GOOD WITH YOUR TALENT! If you want to use up yarn and time, do it for a good cause!”

Then, I seen this:

My Facebook was blowing up with it! Not only was it being shared by every single knitting group that I like, but my friends were also sharing it. According to CTVNews this yarn bomber was leaving notes attached that said to “take the scarf it you need it!” Wow. I’m already impressed. No name was associated with it, just a good Samaritan. THIS was impressive. THIS was important. THIS was worthwhile. 
I run an organization called Warm up the Boro. I collect and make hats and scarves to donate to the needy in our community. I’ve been doing it for a little over a year now, and we just had our first distribution. It’s been difficult to get donations locally, so I have some plans to try and expand it. BUT! I wish you could’ve seen the faces of those that got their new hats this past weekend. Many were overjoyed and enormously thankful. 
Donation day. We had already given out a bunch of hats!
Part of our collection! 
No, I didn’t yarn bomb, but I can see the potential in this! Whoever did this doesn’t care what your circumstances are, here is a free scarf. This was done with intent and purpose and a great outcome. 
Now, before someone jumps down my throat about my OBVIOUS hatred of yarn bombing, let me say that I DO know that some of these other works are donated to shelters and such after the bombing. That’s great. I really can’t say anything bad about that. My distaste comes from those that just leave it. I’ve never met a fire hydrant that needed a scarf. Not. One. Although a dog could probably see some wiping value in it. 
Now about knitting and crocheting food…

Crafty Monday: Time Management Fail

Right here should be a really awesome blog post about making a closet in a weekend. Yep, that’s what I had planned. Unfortunately, it didn’t happen. Things just didn’t come together, I didn’t have the right materials, and I spent my Saturday doing something else. Not that I would’ve done anything differently on my Saturday, but it was just one of those projects where I had an idea, thought it would work, but nothing. Nada. Zip.

I got one part of it done, but it took me most of the day on Sunday. By the time I wanted to finish it, Sunday was nearly over. We were also dealing with two sick children. I also run a charity similar to Warm Up America, but I try to keep it local. It’s called Warm Up the Boro and if you’re interested, please stop on by our Facebook page and check us out. I spent most of the morning handing out hats and scarves to those that didn’t have any at our local soup kitchen. It was so much fun, and such a blessing. Little kids walking out with warm hats that they didn’t have previously, and adults that wore theirs the entire time they were there. Even here in South Georgia it’s been very cold and the wind chill has been killer. It took a year’s effort and many donations to make it happen, but it did. If you follow anything about knitting, you probably saw the scarf on the statue last week? I think that should be up for “Best Possible Use of Yarn Bombing EVER!”

The post that should’ve been here, that isn’t, should be by next Monday. I did put forth good effort. But, things happen I guess. And it gives me fuel for tomorrow’s Knitting Tuesday post. 🙂 

Friday Tutorial: Knitting Two Hats at a Time, Part 2

 Last week we left off on finishing up our ribbing for the brim of our hats. We discussed how to cast on to four double pointed needles using two different yarns and how to keep the stitches divided so that we end up with two separate pieces of fabric. This week we’re going to take a look at how to make stockinette stitch so we can work on the body of the hats.

Stockinette simply means that we knit every stitch on every row. To do this with our two yarns in double knitting, we will have to bring the front yarn forward and backward, but leave the back yarn in the back. The difference is that we no longer have to worry about moving the back yarn to the front.

Now, this CAN be done without moving either if the yarns and working a reverse stockinette in front (purl every front stitch) and a regular stockinette in back. However, when I did this with my first pair of two-at-a-time socks, I ended up with horrible ladders where the joins were. This method seems to work better.

Following Rachel’s pattern, we start knitting in stockinette for the body. To begin, make sure both yarns are to the back and you are starting with your front color (blue in my case) to make a knit stitch.

Make the knit stitch, then move the front yarn to the front of the work.

Make the second knit stitch with the alternate color (orange).

Now move the first color to the back of the work to make the third stitch. Continue in this manner until you have knit you’re hat to the length specified for the body before making the decreases.

Knit in stockinette the hat starts to take shape

For part 3 next week we will finish the hat by learning how to decrease the stitches for the top of the hat. 

Sewing on Thursday: An armrest sling for crafty projects

I have a mess in my living room. It’s not from the kids, or the dogs, or even the husband. It’s me. All mine. It’s globbed up in piles in various areas. I have organizers and bags filled to the brim with tools and accessories, yet none of them seem to be able to give me the rapid availability I require for my projects? It’s a conglomeration of yarn, threads, sewing needles, knitting needles, crochet hooks, patterns, scissors, stitch markers, and coffee cups.Try as I might to keep it tidy, I get back in there at the end of the day and start working on my projects. Before long, everything is right back out again. After 2 days, I’ve given up trying to put it away when I’m finished with it, because rarely is there a point where I say, “Ok, I’m done for the night.” Nope. What usually happens is that I work up until I send the kids to bed around 8. Then we go in, read or tell stories, say goodnight prayers, and drift off to sleep. Yes, me included sometimes. They’re just so warm and snuggly. It’s difficult.

I want all of my tools right where I can easily grab them, without having to undo an organizer roll or search through the bag at my feet. They need to be ready instantly and be able to drop right back into place. So I created: The Armrest Project Organizer

Materials:

Approximately 2 yards of top fabric for sling top and pockets
1 yard muslin or backing fabric
lightweight interfacing
thread
ruler

First things first, measure your couch. I went from outside in, first measuring the drop on the outside of the arm, then the top of the armrest, the drop inside the armrest, and across the bottom of the couch under the cushion.

Also measure the distance front to back for the depth you want.

My measurements were 10″ outside drop, 8″ top of armrest, 13″ inside drop, and 21″ across the bottom. The width was 18″ across. Add 1/2″ to all of your measurements. I’ll be referring to my measurements throughout, but please substitute your own measurements for mine.
Cut from top fabric

1-18.5″ x 21.5″ (bottom)

1 – 18.5″ x 13.5″ (inside drop)
2 – 18.5″ x 8.5″ (top of arm/pocket)
2 – 18.5″ x 10.5″ (outside drop/pocket)
1 – 18.5″ x 5.5″ (pocket)

Cut from muslin or backing fabric

1-18.5″ x 21.5″

1 – 18.5″ x 13.5″
1 – 18.5″ x 8.5″
1 – 18.5″ x 10.5″

Cut from interfacing for pockets

1 – 18.5″ x 8.5″
1 – 18.5″ x 10.5″
1 – 18.5″ x 5.5″

  1. Using 1/4″ seams, match the sections to each other, right sides facing. Outside arm to top of arm, top of arm to inside arm, and inside arm to bottom. You’ll have one long piece of fabric x the width you chose. Iron all seams open.
  2. Do the same with the muslin or backing fabric. I chose to cut these in sections so that they would hang better on the couch. You could also do one very long piece of each fabric if you choose.
  3. Iron on interfacing to the 3 pocket sections. Turn the top edge of each pocket under 1/4″ and stitch down to create a narrow hem.
  4. To do the pockets, decide how many sections you’d like. You’ll only be able to section one of the pockets in this, and I chose to do the middle pocket. I made one 6″ section and three 4″ sections. I matched the edges of the bottom and sides to the longer (10″) inside section and sewed straight lines from the top of the middle pocket to the base, then sewed a 1/4″ seam around the sides and bottom.
  5. Layer the bottom pocket to the other two pockets and sew around all three thicknesses.
  6. Match the main fabric to the muslin, right sides together, lining up seams and edges, and sew 1/4″ seam all around, leaving an opening for turning.
  7. Clip the corners and turn the piece right side out. Iron flat and top stitch around seam allowances.
  8. Attach to armrest by laying long piece under cushion and over the top of the armrest.
TADA! You now have a beautiful, one-of-a-kind armrest project sling. You can use this for any type of craft such as knitting, crochet, needlepoint and much more. You can also use it as a handy remote control holder or a candy bar stasher. I hope you had fun with this and as always, if you make one, please post it to our Flickr group! 

Tuesday Needlework: The difference between crochet and knitting

Have you ever been quietly enjoying your coffee (tea, latte, frappe, insert beverage here) in your favorite coffee shop while working on your current crochet project, dressed in your awesome asymmetrical cardigan and slouchy hat (that YOU made, btw) only to have some person obviously uneducated in needle arts come up and ask you, “What are you knitting?”

As the hair on the back of your neck raises and you feel your blood start to boil, you ever-so-patiently take a sip of your beverage with the cozy on it that YOU crocheted, look up and say, “I’m not knitting. It’s crochet.” And inside your head you’re thinking, “If it was knitting I’d have two needles to jab you with.” Yeah, don’t act like you’ve never thought this a time or two.
I pursue both knitting and crochet because I find they have their purposes for different items. I don’t necessarily like to make clothing such as sweaters from crochet, but that it is great for scarves and hats.It is too bulky for my taste preferences.

Crochet stitches for a hat
Knit stitches for a hat

I have made cardigans and such, but as for sweaters, gloves, and socks I just think the stitches are too big and it looks too “homemade.” Before you string me up, remember, this is just what I feel about it and that I have nothing against homemade. I think knitting has a smoother look and the closer stitches make for a much more appealing fabric for clothing.

However, if you want something done faster, your best choice is crochet. I can work up a crochet piece in half the time it takes me to knit something. This is also because the stitches work up about twice the size of a knit stitch. I think it may have a lot to do with only using one hook as opposed to two needles, too.
So what is the major difference? Well, if you do one or the other you probably already know the answer to this. I’m hoping to reach out and educate those that may not know, and hopefully one day the world will be a much better place when the two are not confused, inciting violence in the mind of an otherwise peaceful needleworker.
If you take the time to notice, crochet is performed using a single needle with a hook on the end of it. The crocheter is usually in a very rhythmic trance with yarn in one hand and a hook in the other. Knitting uses TWO needles. These needles DO NOT have hooks on the end of them, but are rather sharp and pointy. The knitter will also have a rhythm down but it will not be the same as the crocheter’s.


Interrupting a crocheter usually means you will interrupt their counting. This is not a good thing. If they sigh audibly and visibly start counting stitches with a louder voice (not the voice inside their head) you had better back away slowly and never, ever speak to them again. To repeatedly ask questions is not wise.
The same could be said for a knitter, except that for some reason they have a tendency to use stitch markers more often and once they are sure of their stitch count, rarely have to repeat counting. This is not a guarantee, though. Ask yourself, “Do I really want to mess with or upset someone that can use sharp, pointy objects with obvious skill and grace and how much does she/he really value that yarn they are using? Would they mind a bit of blood?”
If you feel you MUST talk to the knitter or crocheter while they are working, it is best if you sit patiently and watch them work. You may pick up a thing or two in the process. When they stop their hand movements to take a sip of their beverage, it is probably safe to talk to them. Hopefully you are intelligently armed with the correct question of, “What are you knitting/crocheting?” If you get it right, the needleworker is usually more than happy to speak with you about their project.
I hope this has reached someone in time to avoid serious injury. If, however, you are sitting in a hospital bed with puncture wounds and reading this, I hope that at your next encounter you will be better informed. Cheers, and quick healing…

Friday Tutorial: Knitting Two Hats at a Time, Part One

 Remember in Tuesday’s knitting post that I promised a tutorial for knitting two hats on a set of double point needless? Here it is! I didn’t want to do socks because there are a couple of tutorials and classes out there, the ones I’m familiar with were listed in the last post. But me and my self thought that since we had already done socks, a hat would be a breeze. No short rows for one thing! What is amazing about knitting these two at a time is that you can make a multitude of things using this method. I’m anticipating working some sweater sleeves for one thing. No more single sleeve sweaters!I’m using a very simple hat pattern from Ravelry by Rachel Sonntag called  Simple Beginner Toddler Hat. It’s a basic ribbed brim and stockinette stitch in a worsted weight yearn. If you’d like to follow along with this pattern, please check out her link and download it for free from Ravelry.

Materials:

Pattern Simple Beginner Toddler Hat
4 oz worsted weight yarn in 2 contrasting colors
Size 6 dpns (or size needed to obtain gauge)
Size 6 knitting needle at least 10″ long
stitch markers

Ok, once you have your pattern downloaded it is important to note the gauge. Her pattern calls for size 6 dpns and circulars. We’re using 4 or 5 dpns only because it more closely relates to doing the socks later. However, you can also use this method on a circular needle. I knit loosely, so I always drop a size down. When knitting two at a time, your stitches are spaced further apart than normal too. So it is a good idea to go down one or two sizes to match the gauge. I’ll be using 5 size 4 dpns.

Casting On

Cast on the required number of stitches for your chosen size. I do this using the super stretchy method for the ribbing (follow link for YouTube video). I cast on to 4 of my 5 needles. When I do this I just work one or two stitches more than I need on the first needle and slip them to the next one so I’m not concerned with making a new stitch.

For example, each of my needles will have 22 stitches for a grand total of 88. I cast 24 on to the first needle, slip 2 to the new needle, and work 22 more, slipping 2, k 22, sl 2, k20. Then join.

Now for the fun part! Knit one round in ribbing. Just like a normal hat. Then when you reach the next round, we join our new yarn and second color.

Joining the new yarn requires that you first cast on the total number of stitches (88 in this case) to a longer straight needle the same size as what you are knitting with.

Long straight needle with 88 stitches cast on
Now, holding the straight needle in back of your first dpn, slip the first stitch from your dpn purl wise. Then, knit 1 stitch from the straight needle. Slip the next stitch purl wise from the dpn (blue) and purl the next stitch. Remember to move your working yarn (orange) back to the back of your work before slipping the next (blue) stitch.

You’ll only be working with 1 thread from the straight stitches. In essence, what you are doing is knitting the first row of the second color while placing the stitches onto the dpns. This works much better than trying to cast on each color initially. You’re also working in k1, p1 ribbing to match the ribbing on the first row of the first color. Continue to slip stitches from the front row (blue) and working k1, p1 from the back row (orange) until all of the stitches have been worked.

Whew! That’s a lot of stitching! If you’ve made it this far, congratulations. You’ve cast on your stitches and you’re ready to begin the yarn acrobatics of double knitting 2 at a time.

Knitting the Ribbing

For the next part we are going to work with 2 strands of yarn. Your fingers will need some training. I like to hold my yarns with my pointer finger between the two strands, working forward and backward as required. I’ve tried one of those finger things for stranding and they just didn’t work for me. They may for you, though. This is difficult, so don’t lose patience. Just keep trying different methods until you find what works for you.
For row 2, you will hold both strands of yarn to the back because you are working a knit stitch. With your strands separated, knit the first stitch from needle 1 (blue).

Move the blue strand to the front of the work. Knit the next stitch (orange), but keep the yarn to the back.

This should read “Keep yarn forward, knit next orange stitch”

Purl the next blue stitch and leave your yarn in front as if to purl.

Pull the orange yarn to the front of the work and make your purl stitch. Then move both yarns back to the back. After four stitches you will be in the same position that you started in, with both yarns to the back of the work and ready to make a knit stitch with the first color.

You will continue to do this until your piece measures what is stated in the pattern.

I’m going to leave the remaining part of this tutorial for next week. Work on the ribbing, don’t get frustrated, and remember that a good cup of coffee is a great cure for aggravation. If you have any questions, feel free to leave them in the comments. You can also find my pattern notes and project on Ravelry.

Knitting Two Socks at a Time

A couple of posts ago I wrote about the resurgence of old techniques such as tatting, and how some techniques seem to catch on for a while then die away again. I have another one to share with you that some may find very interesting.I’m sure you’ve heard of magic loop socks. These are knit on the a long circular needle. You knit one sock, and then the other on a second pass. So with this method, you ARE knitting two at a time, but still knitting them separately on one needle. So for every one row that you do, you still have to repeat the row a second time on the other sock.

The method I’m discussing is not the Magic Loop. This is a Double Knit method using double point needles and literally knitting one sock inside of the other at the same time. The Annie’s Catalog class “Magic Socks” teaches how to use the same method on a long circular needle in the magic loop style. However, I don’t own a good pair of circulars with a long enough and flexible enough cable. So for me, the dpns seemed like the best fit!

So what is this exactly?

Well, if you’ve ever tried double knitting, you’ve come half way to doing two socks at a time! Double knitting is a process that uses two strands of yarn on double pointed needles. The yarns are worked together and produce a thick, double-layered fabric that can also be used to show mirror images on either side. Here is a really good example on Ravelry by Heather Zoppetti that would make for excellent practice if you so desired.

Now that that’s out of the way, let’s discuss how we knit 2 socks without having them stuck together. The concept is pretty much that you are going to knit using 2 strands of yarn that are never crossed over each other. To do this, you have to knit one strand in the front by bringing the yarn to the back, then separating the yarns and bringing the front yarn to the front as if to purl, making the knit stitch in the back with the second yarn, then bringing the front yarn back again to make the next stitch. What you end up with is 2 separate socks, knit at the same time, with two yarns. Confusing?
I thought so at first, too. But I can’t confess to having only used one method. I also used the method by Kory Stamper in her article on Knitty to work out the kinks. I have included a bunch of notes in my Ravelry project for the changes that I made and why. But I DID succeed in making 4 socks. The images below only show one pair, because my daughter scarfed up the other ones and I can’t find them right now. Kids…

As I was knitting these socks, I thought to myself, “Self, I bet we could knit just about anything tubular using this method.” So self and I decided that we would try it! We knit 2 slouchy button hats (also a great Ravelry pattern!) using 2 different colors. Since I also knit hats for charity, I was ecstatic with the thought that I could knit one for personal use (see daughter below? She took the orange one and then other daughter has successfully taken the brown one) and give one away. While that idea only works if you don’t have daughters that like hats, it is an excellent one. This same technique can also be used for knitting two sleeves, two boot cuffs, two pot holders…you get the picture. They don’t have to be tubular either, as in the case of the pot holders.

I would not suggest using this technique for cabling, unless you have the patience of Job. Knitting two stitches together involves moving stitches around on the needles. It can be a bit tedious. I’ll probably try it one day. Just to do it. And say I did.

Since there are a couple of tutorials on the socks that I mentioned in this post, I will be posting a tutorial Friday on making the hats. I’ll be using a baby hat pattern and worsted weight yarn for a speedier finish than the dk and sock weights I used previously. The tutorials will be in 2-3 sections, depending on what I can cover. So stay tuned, and check back for more!

Why Buy Homemade?

Art Credit Stacey Sobelman https://www.etsy.com/shop/SMARTdesignsbyStacey

So this holiday season, you’re probably going to see a lot more of the “buy handmade” slogans flying around. But why? Isn’t homemade more cheaply made? Doesn’t it cost more than buying from a big box?

The answers are no and yes. Okay, then what makes it better than a big box and why should I pay more? Here are the answers from my experience both buying and selling:

 What Makes Handmade/Homemade Better? 

When you buy something that an individual makes, you are buying something that they take time to make, usually one piece at a time, just for you. Most artisans that make items for sale make it with the conscious thought that people will buy their items. When people buy the items made by the artisan, that artisan also knows that they will either come back and buy from them again or they will leave positive or negative feedback if they are in a shopfront like Etsy, Artfire, or Zibbet. Negative feedback negates future sales. Shoppers DO read the feedback, just like on Ebay. If the artisan wants recurring sales and positive feedback, they are going to do their best to make your item to the very best of their ability. 
Unique Wooden Bangle Decoupage by UniquelyUJewelry on Etsy

So How is That Better Than Retailers? 

Reluctantly, I’ll answer a question with a question. How many times have you bought something from a big box retailer only to find out later that it is falling to pieces or only lasts for a little while? Have you ever stood in line to make returns for an item that doesn’t work? If you answered yes to either of these questions, then you’ve answered the above question. When something is made individually, it also means that the item is of more value and better built than something that is made on a mass production assembly line. Rolls Royce, Bugatti, Ferrari…they all understood this. That is why you will pay more to own these vehicles as opposed to a Ford, Chrysler, or Chevrolet. They are individually made, with great care and precision, to give you what you pay for and with fewer problems down the line. 
Good reviews equal repeat buyers and customer confidence
Retailers have no feedback system nor do they care about quality very much. I used to work in the restaurant industry and one of our main rules was that bad word of mouth travels much faster than good word of mouth. This is true! One bad experience can and will be retold thousands of times. One person tells another, then that person tells two or three of their friends, they tell two or three more of their friends and it snowballs. Restaurants have died because of this chain of by mouth feedback. Ask Bennigan’s. HOWEVER, retailers don’t seem to live by this rule. Walmart sucks. They have terrible service, terrible product, and if we’re honest, terrible prices. Yet people continue to go there on a daily basis. If you return a product to Target, you blame whomever made the product, not Target. Why? Because we don’t relate that Target is buying their products from the manufacturer – and continue to buy it independent of the negative feedback or returns – so we continue to buy it. There are exceptions, and I’ve only named two retailers, but many, many more have this same process. There is no responsibility. Eventually, the wholesalers of the item may recall a defective product, but it takes a very long time and a lot of press for this to happen at any level. Restaurants live by the rule because they are seen as a major front running supplier. They cook the food and deliver it. You don’t blame the food supplier, the oven manufacturer, or the deep fryer – although these may also be to blame if they’re buying cheap food and equipment – you blame the cook and servers. If the servers are rude and untrained, you also have a front runner to blame, not their trainers or managers. So you can hopefully see the correlation? 
Once again the people making your handmade goods are also the front runners. They are making the product. You can’t blame it on the wire they use, the beads, the fabrics, or whatever else. 
Wire Wrapped Jewelry Set by Earthly Baubles on Etsy (click image for link)
Although great care is usually taken to provide quality products using quality ingredients, the final product and how it is made are judging criteria. Artisans will fail, repeatedly, if they don’t produce a quality product. It’s as simple as that. 

Why Should I Pay More? 

After the previous two answers, I hope by now you’re getting the idea that to make quality, you must first buy quality. In my quilt process, I use two major ingredients that I must depend on to make good quilts: batting and backing fabric. The batting is all the guts inside between the top and the back. It has to be good, otherwise it won’t hold up to quilting, use and washing. The backing fabric must also be of good quality. It has to be thick enough not to let the batting show through, not tear when it is being quilted, and iron out after washing. I want people to USE their quilts. I believe that if you’re going to make and buy something, it shouldn’t be on a shelf in the closet. That defeats the purpose! But I also want my customers happy. So to buy quality ingredients, I have to pay more than I would for the cheap stuff. I don’t get quality cheaply. Even if I buy fabric and batting wholesale, I end up paying more for it than I do the cheap stuff. This is called investment and it must be regained to make a profit. 
Unique custom-made quilt by Freckle Dots
Quality ingredients and attention to detail also mean that I am spending a good deal of time on your quilt. The only employee I have is my dog Freckles. She is the costumer relations manager and business representative. She greets customers that come to the door, represents my business in name and attitude, and provides me with comfort and encouragement on a daily basis. However, she doesn’t really help much in the design and manufacture process, nor does she assist greatly on the computer unless she’s warming my lap. I only pay her in dog food and chewie sticks, so I can’t count her as “helping” much with my quilts. Therefore, I am a one-woman operation and I take care of every aspect of my business like advertising, manufacturing, design, customer service, shipping, and purchasing. I invest countless hours in my business that I really don’t get paid for in the final product. 
The hours I spend actually making a quilt add up. I cut the tees, starch them, iron, design, shape, sew, re-cut, sew again, sandwich, quilt, bind, package, and ship each and every one. This process can take up to 8 hours a day, for 10 days. I usually have other things to do like pick up kids, go grocery shopping, buy fabrics, feed the dogs, etc. so the entire process takes about 3-4 weeks. I honestly make less than minimum wage even after raising my prices if I consider the hours I put into each quilt. I enjoy my work, and the income helps with things like those pesky bills and gas, so I keep doing it. I will never become a millionaire though. 
Bugatti Wallpaper (click for link)
Because I am putting individual attention and time into each and every quilt, you can expect to pay more for it than the cookie cutter $25 quilt that comes off the assembly line and ends up at your local retailer. You can also expect better quality and longer enjoyment. My Bugatti verses their Ford, in other words. 

The Final Answer

Again, with the questions. Do you want quality or do you want crap? Do you want an individually made, one-of-a-kind item, or a cookie cutter product? Personally, if someone buys me something from a store I’m like, “Oh, wow, thanks.” But if they take their time to make something for me, or buy something handmade, I’m like, “OH, WOW, THANKS!!!! This is awesome! Wherever did you find this? How did you make this?” If you have kids, you know this from your collection of  macaroni necklaces. It touches your heart. 
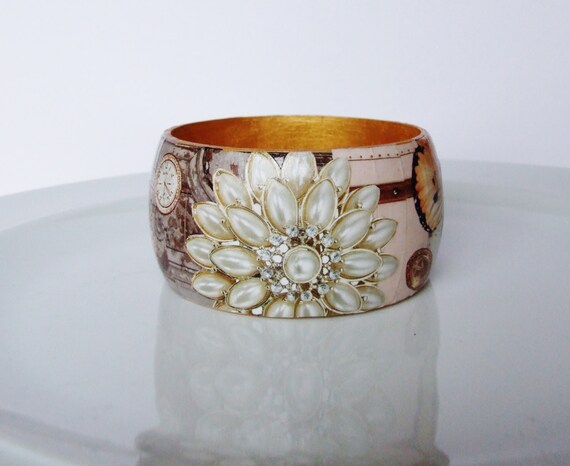
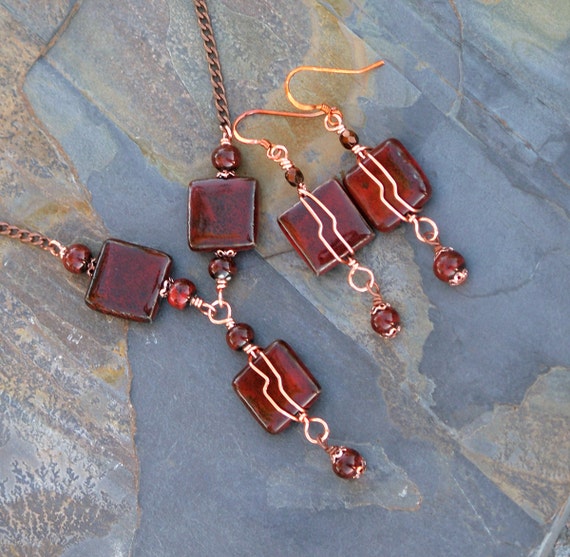
I’m not saying you should buy Joe’s homemade television from recycled parts and rabbit ears, but you should definitely consider buying special items for special people. Have a friend that likes to sew or knit? Buy her a set of handmade wooden or leather buttons or some carved wooden knitting needles. She’ll hold those up much more proudly and show all of her friends before she would something you bought from the store! 
BA Knitting Needles Giant by xiane on Etsy 
Boyfriend or husband have a collection of tee shirts taking up closet space? Have a quilt made for him. Check out the artisans on www.Etsy.com, www.Zibbet.com, and www.Artfire.com.
Don’t buy cheap, don’t make big retailers richer with YOUR hard earned money, and do something unique this year! Buy handmade. Make it personal. Make it unique. Get more for your money. 

Yarn for the Shhh! Project has arrived!

I received my hand-dyed silk and merino blend yarn in a luscious tangerine color a couple of days ago. The pattern uses a combination of sock weight and lace weight yarns. I would definitely be tempted to buy some to make matching accessories (like a lace shawl or scarf!!!) with the beautiful color variations.

Lace Weight (left) Sock Weight (right) of the silk/merino blend yarn for Shhh! Project

 Last night I spent 2 hours winding it into balls from the hank. Normally, I detest doing this. It takes up waaaayyy too much time and energy. Why buy a hank of very expensive yarn and then still have to sit there and wind it up in one way or another. Call me cheap, but if I’m paying over $10 for a hank of yarn, I want it wound. So I also don’t normally buy hanks. Yep, I miss out on a lot of really cool yarn this way, but my hatred for winding trumps my love of fiber. This yarn was free with my test knit, though, and I wasn’t too upset about having to wind it.

It was kind of nice by the second hank. The first hank came off of my chair back, got all twisted up, and took up the majority of one hour to finish untangling and winding. The second one went a lot smoother. Feeling the softness of the silk and merino glide through my fingers was nice, and the subtle color variations in the yarn were mesmerizing to watch come together.

I refuse to buy a swift and put all that money into something that just holds the hanks. Maybe one day I’ll find one used and pay a reasonable price for it. I don’t own a yarn winder either. If and when I have to roll a ball, I use my hand to get it started, then put a knitting needle in the middle of it and wind around the needle. This saves my fingers some unnecessary stress too!

Of course, after the fact I thought I should have looked online to see if I could find easier ways of doing it. Lionbrand has a great tutorial on making a center-pull skein of yarn. With just a slip knot I could have done the same thing, because this is how I wind my yarn balls on the knitting needle!

If you have a technique for winding your yarn from hanks to balls, please let me know. And remember, I’m all for little to no added expense!!! 

Previous Older Entries